October 10, 2025 - Patrick Kerwood
Setting Up Keycloak SAML Federation with Azure Entra ID
In this guide, we’ll walk through setting up federated authentication between Azure Entra ID and Keycloak using SAML 2.0. By the end, you’ll have Entra ID as an identity provider and Keycloak properly configured to consume claims and group memberships.
If you don’t already have a running Keycloak instance, check out this blog post (opens new window) for setup instructions.
# Keycloak URL Information
Once your instance is up and running, log in to the Keycloak Admin Console, navigate to Identity Providers, and select SAML v2.0.
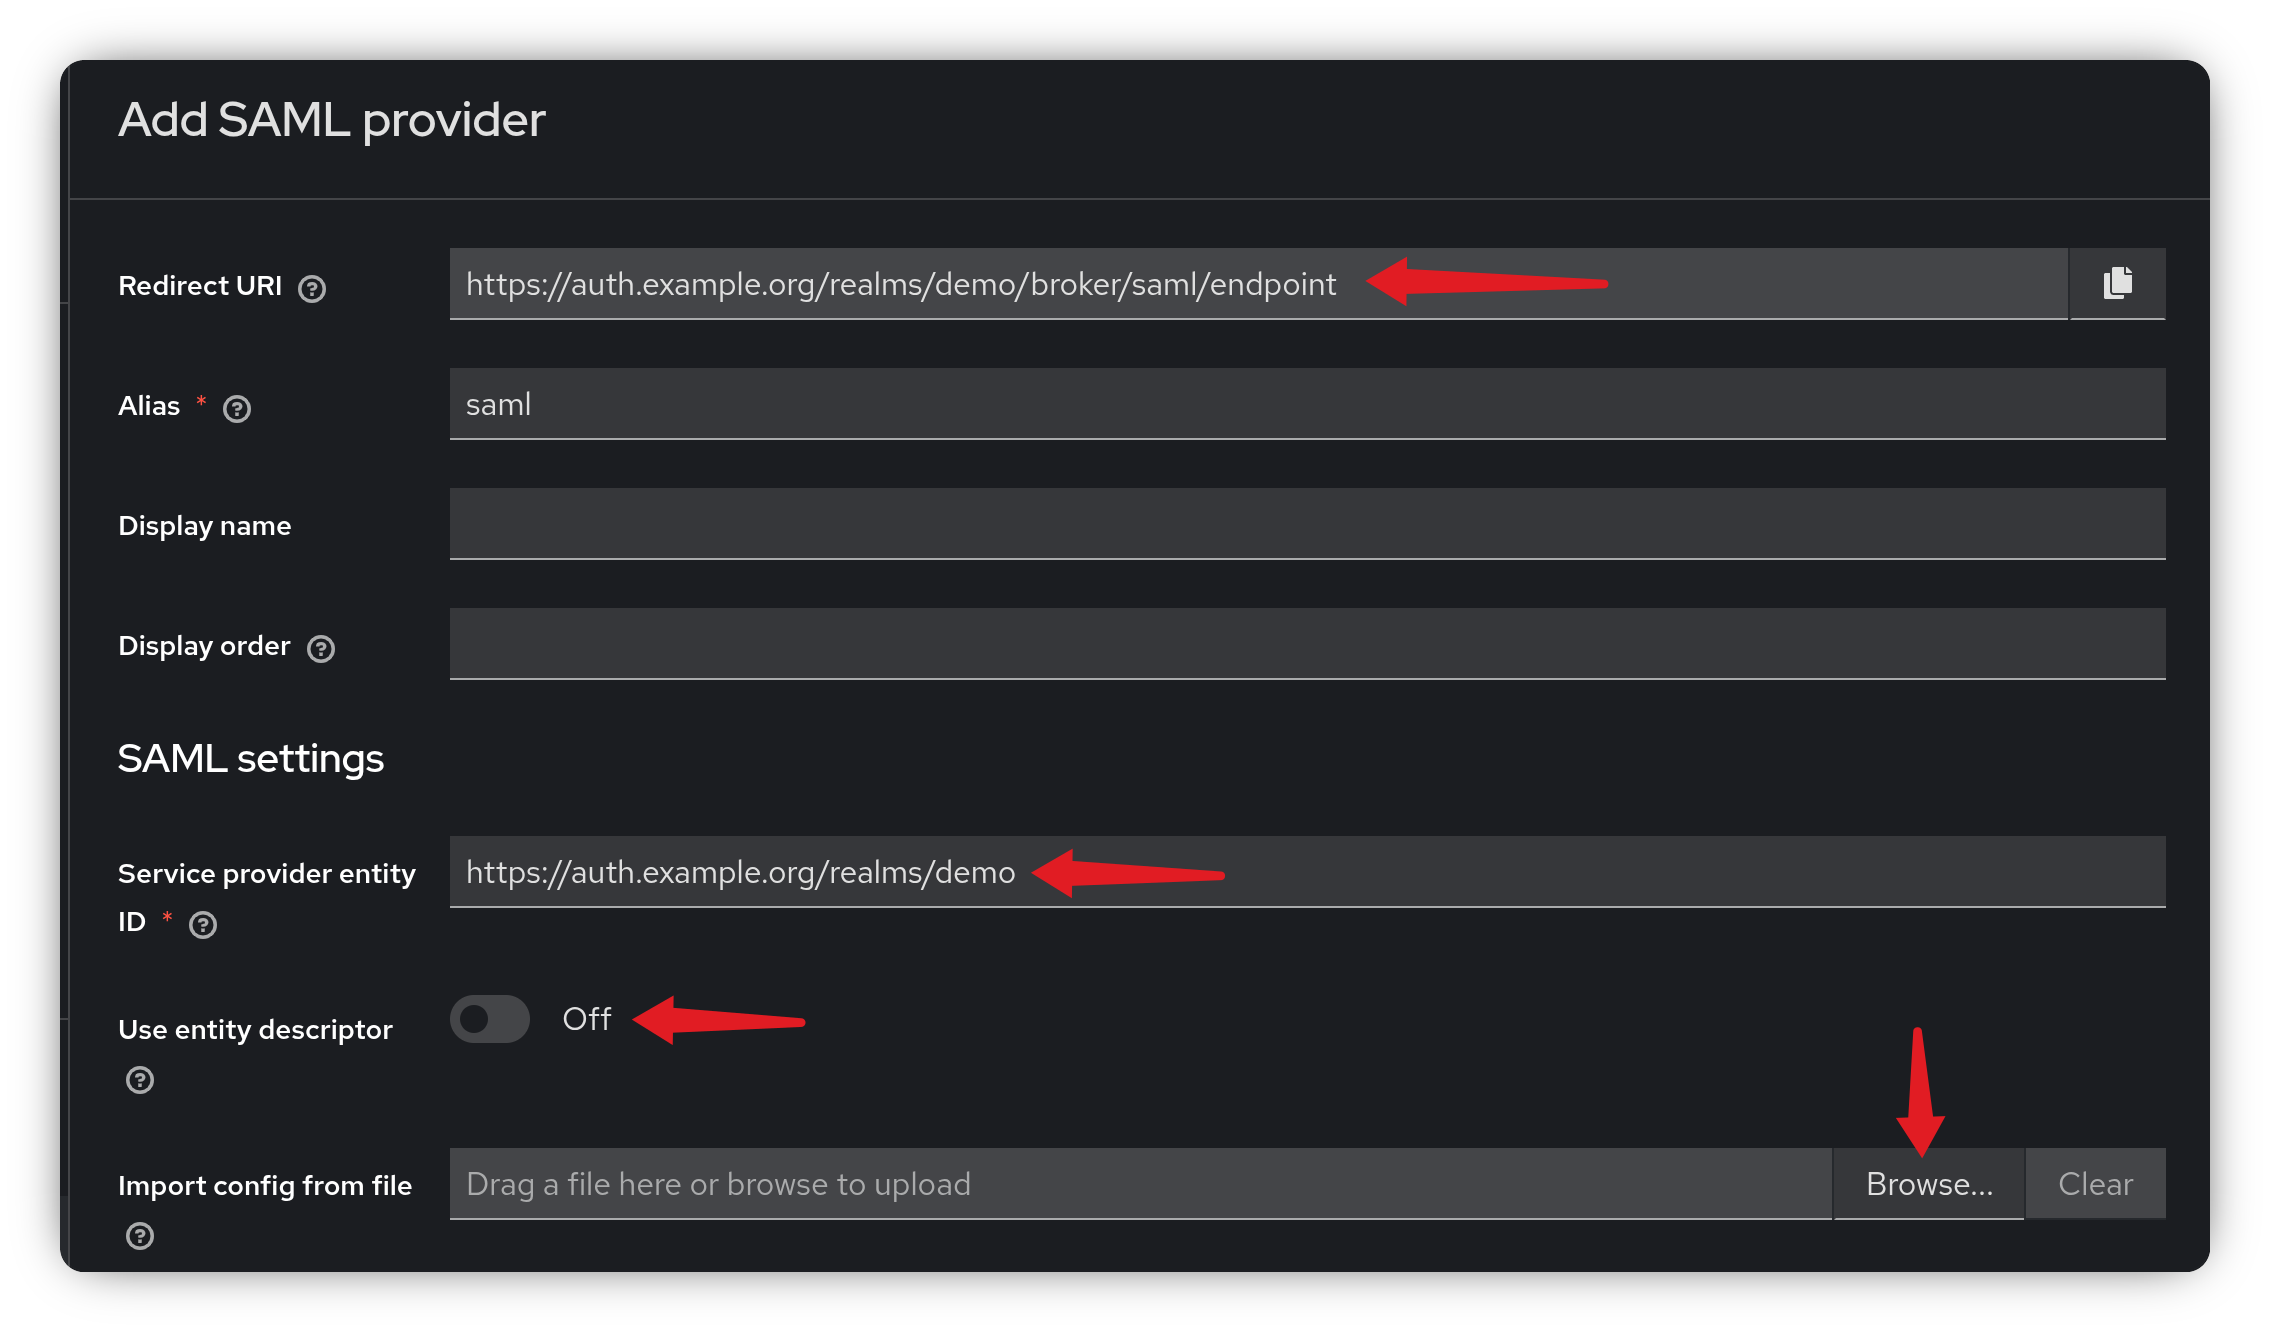
In the screenshot below, you’ll see the Redirect URI and the Service Provider Entity ID. Make a note of these two values, you’ll need them later when configuring Azure Entra ID.
When you return to Keycloak with the metadata file from Entra ID, disable Use entity descriptor, then click Browse to upload the file.
# Create the Enterprise Application
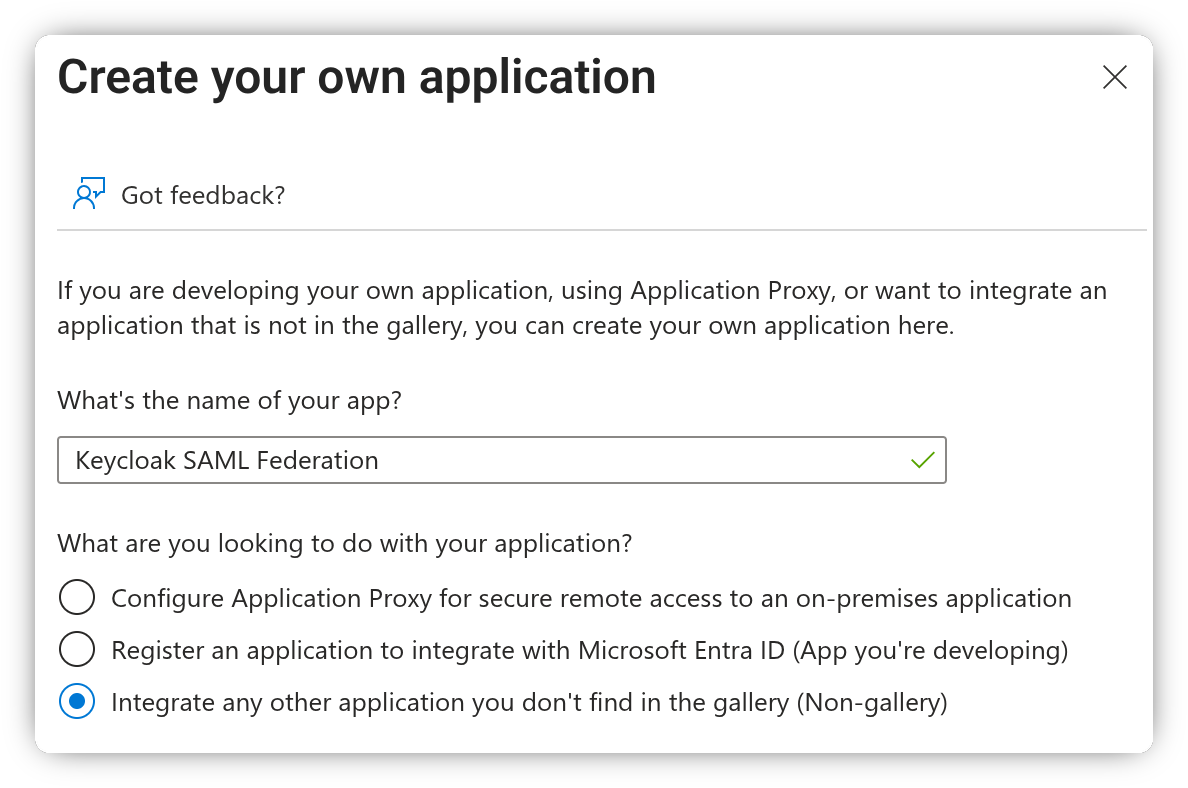
In the Azure Portal, navigate to Enterprise Applications. Click New Application, then select Create your own application.
Give your application a name, select the Non-gallery option and click Create.
In the left-hand menu, under the Manage section, click Single sign-on, then select SAML as the single sign-on method.
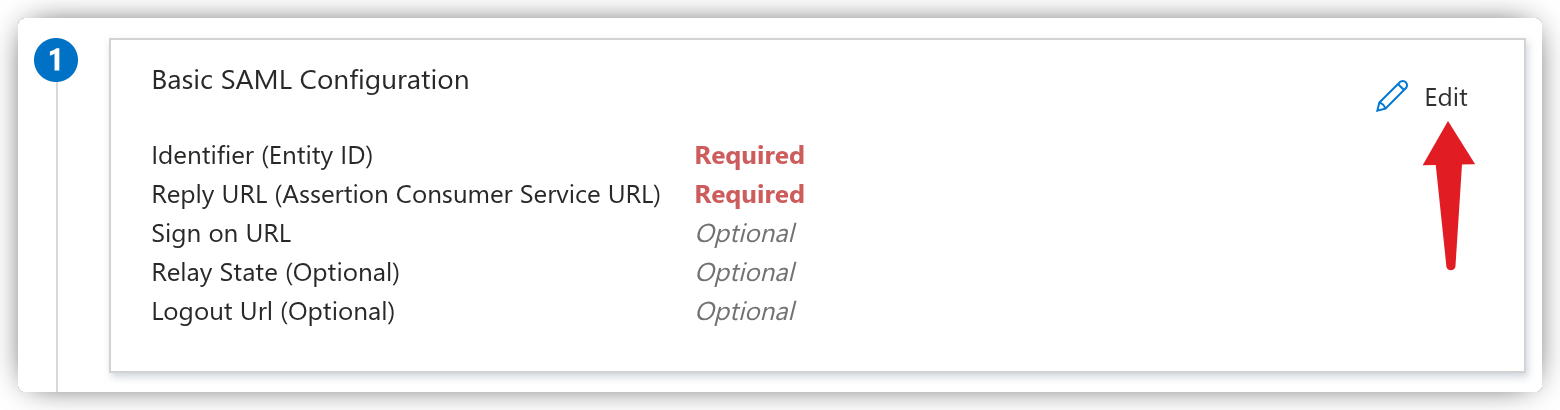
Next, click the Edit button in the Basic SAML Configuration box.
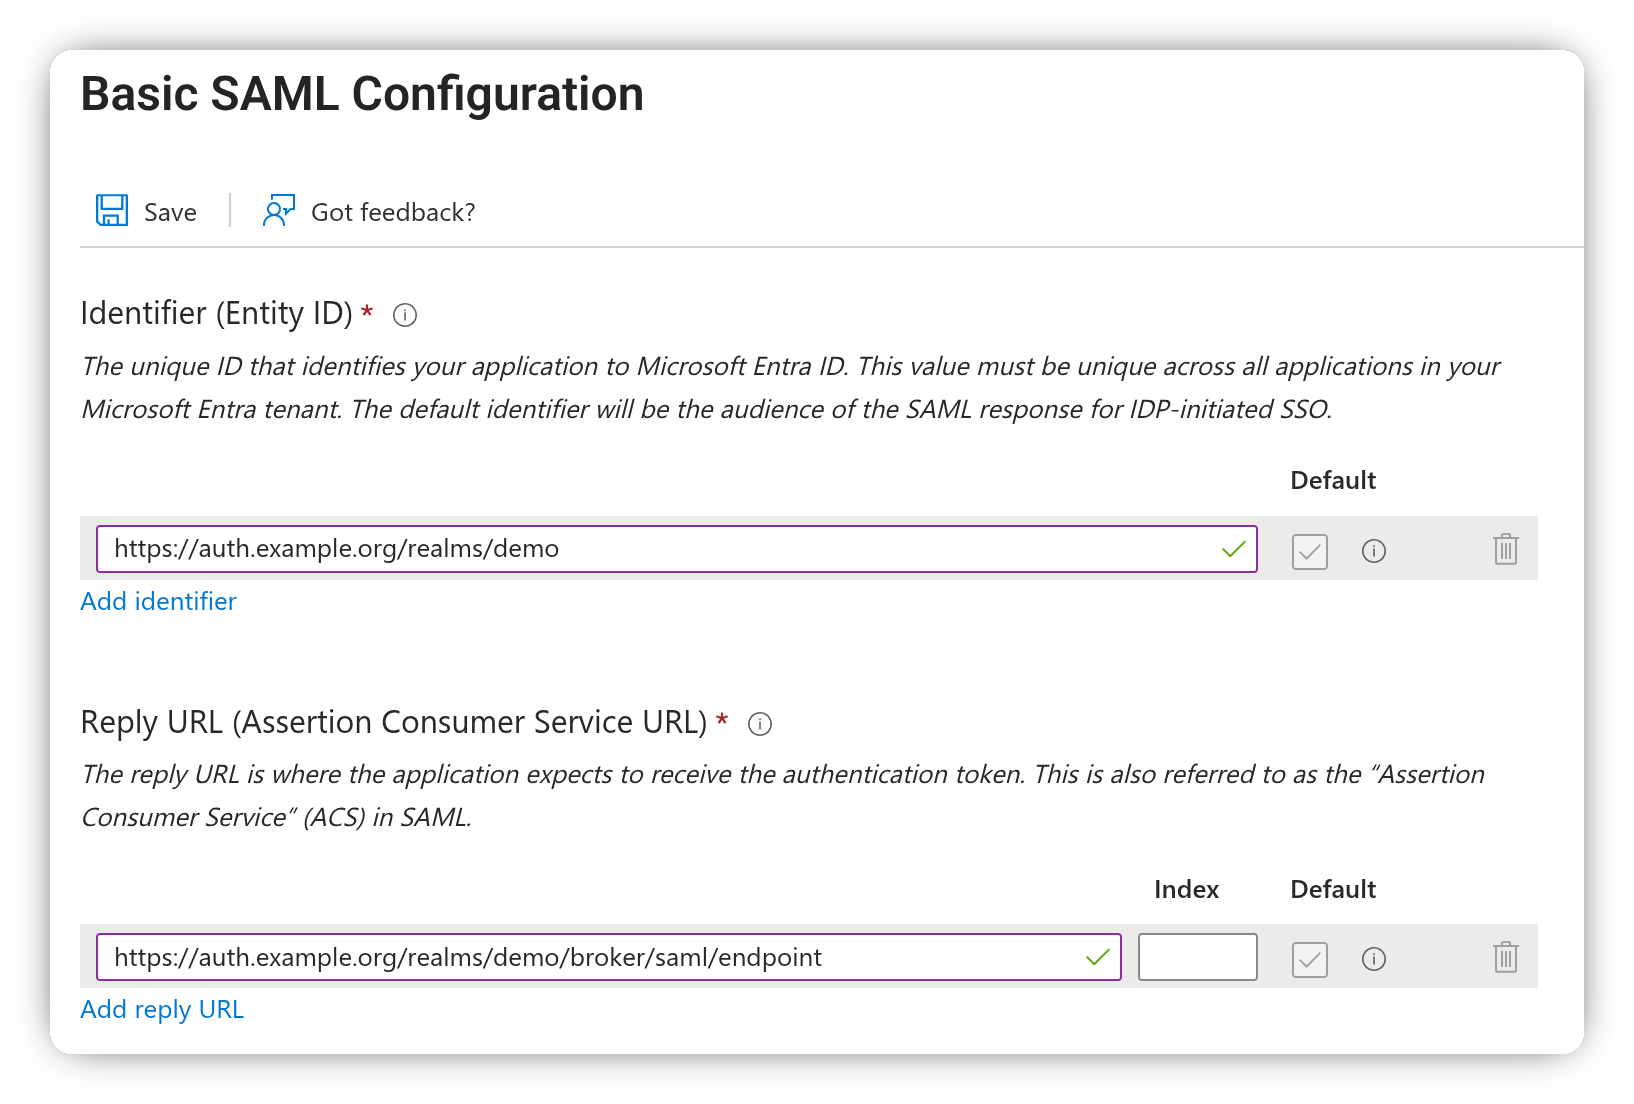
Enter the Keycloak Redirect URI in the Reply URL field and the Service Provider Entity ID in the Identifier field, then click Save.
# Configure the group claim
To include user group membership as a claim in the access token, we need to add it under Additional Claims.
Click the Edit button in the Attributes & Claims box.
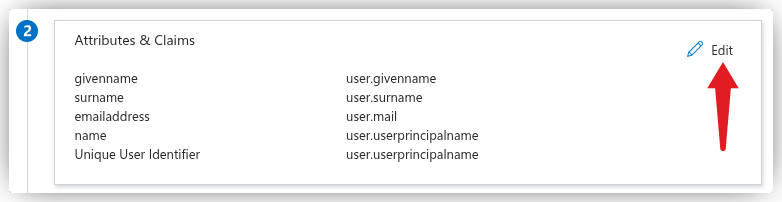
At the top, click Add a group claim. A pane will appear on the right with several options for configuring which groups should be included and which ID to use.
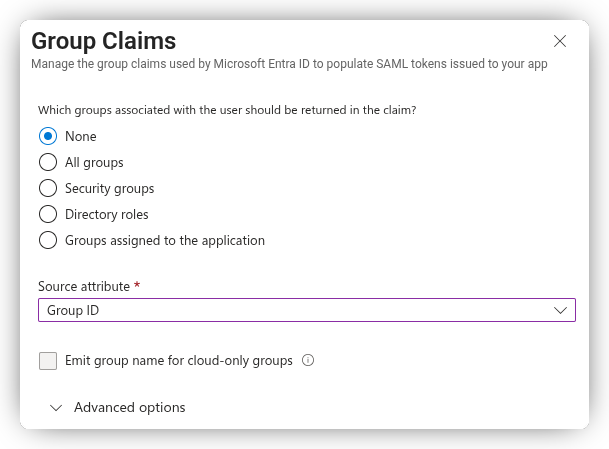
To include all user groups in the token, select All groups.
- In the Source Attribute dropdown, choose Group ID to include groups by their Entra ID UUID (e.g.,
8ab4afff-cc8e-438f-94ca-2c2729afbce8). - Alternatively, if your groups are synchronized from an on-premises Active Directory, you can select sAMAccountName to include the groups by name instead. Unfortunately, this option isn’t available for cloud-only groups.
Including all groups in the token is generally not recommended. If a user belongs to many groups (e.g., 200), the token will become large and expose group membership to all applications using it.
Another option is Groups assigned to the application, which only adds groups assigned to this Enterprise Application.
- With this option, you can choose Cloud-only group display names as the Source Attribute to include groups by their display names.
- For mixed on-premises/cloud groups, select sAMAccountName as the Source Attribute and click the Emit group name for cloud-only groups checkbox. This ensures group names from both on-premises and cloud are included in the claim.
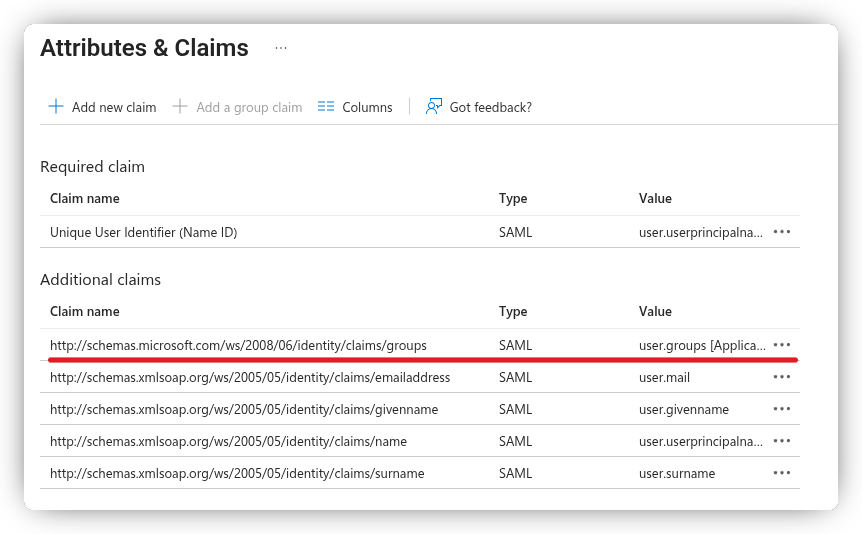
After selecting and saving your group claim option, you’ll see it added to the list of Additional Claims.
# Download the Federation Metadata
Go back to the "Sign-On with SAML" page and download the Federation Metadata XML file to be used in Keycloak.

# Assign Groups to the Enterprise Application
If you selected the Groups assigned to the application option, you’ll need to assign the appropriate groups to the Enterprise Application. Go to Manage → Users and groups, then click Add user/group to assign groups.
With this configuration, only the groups assigned to the application that the user is a member of will be included in the token issued by Entra ID.
# Setting up Keycloak
Go back the Add SAML Provider page in Keycloak, shown at the beginning of this guide.
Give your SAML federation a name, diable Use entity descriptor, then click Browse and upload the metadata file you downloaded earlier.
Finally, scroll to the bottom and click Add to create the federation.
# Mapping Entra ID Claims to Keycloak
At the top of the newly loaded page, go to the Mappers tab. This is where you map claims/attributes from the Entra ID SAML token to Keycloak user properties, attributes, or directly onto the access token.
We need to create a mapper for each of the Attributes & Claims we configured in the Enterprise Application.
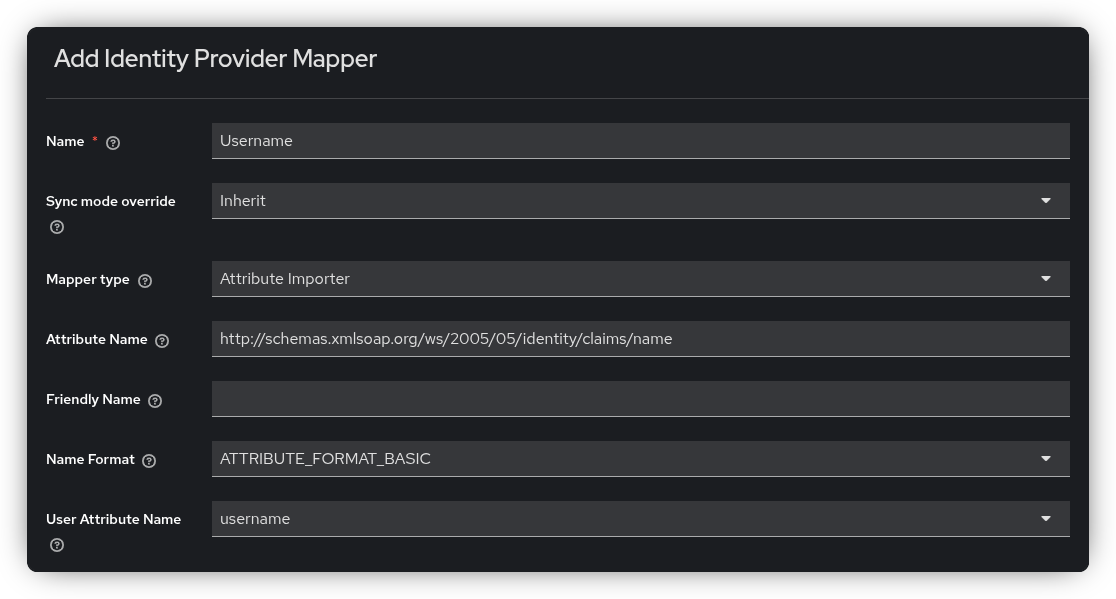
Click Add Mapper to create a new mapper. Let’s start with mapping the username:
- Name: Username
- Mapper Type: Attribute Importer
- Attribute Name:
http://schemas.xmlsoap.org/ws/2005/05/identity/claims/name - User Attribute Name:
username(from the dropdown)
Below is the complete list of mappers you need to create (excluding groups, which is handled differently):
Username
- Attribute Name:
http://schemas.xmlsoap.org/ws/2005/05/identity/claims/name - User Attribute Name:
username
Firstname
- Attribute Name:
http://schemas.xmlsoap.org/ws/2005/05/identity/claims/givenname - User Attribute Name:
firstName
Lastname
- Attribute Name:
http://schemas.xmlsoap.org/ws/2005/05/identity/claims/surname - User Attribute Name:
lastName
- Attribute Name:
http://schemas.xmlsoap.org/ws/2005/05/identity/claims/emailaddress - User Attribute Name:
email
# Handling Group Claims
There are several ways to handle group claims, and none of them are perfect, the best approach depends on your specific use case.
If you’re not using Keycloak groups but still want Entra ID group assignments to appear in the Keycloak token, you can achieve this by storing the Entra ID group list as user attributes in Keycloak. Then, within a client scope, you can expose these attributes as a claim (commonly named groups).
If you’ve configured Entra ID to include all user group memberships in the token, there’s no native way in Keycloak to filter or limit these groups. As a result, all group assignments will be included in the Keycloak access token.
Update
I created a custom Keycloak mapper that filters user attributes before adding them to a claim, ensuring that only the groups you actually need are included in the token.
You can find it here: https://github.com/Kerwood/keycloak-user-attribute-filter (opens new window)
We use the same approach as before with the Attribute Importer, except the claim name/URL is bit different. Instead of mapping to an existing user attribute, we create a custom attribute. Additionally, set the Sync Mode Override to Force to ensure that the user attributes are updated every time the user logs in.
Create a Groups mapper using the configuration below:
- Attribute Name:
http://schemas.microsoft.com/ws/2008/06/identity/claims/groups - User Attribute Name:
entraid_groups(custom) - Sync Mode Override: Force
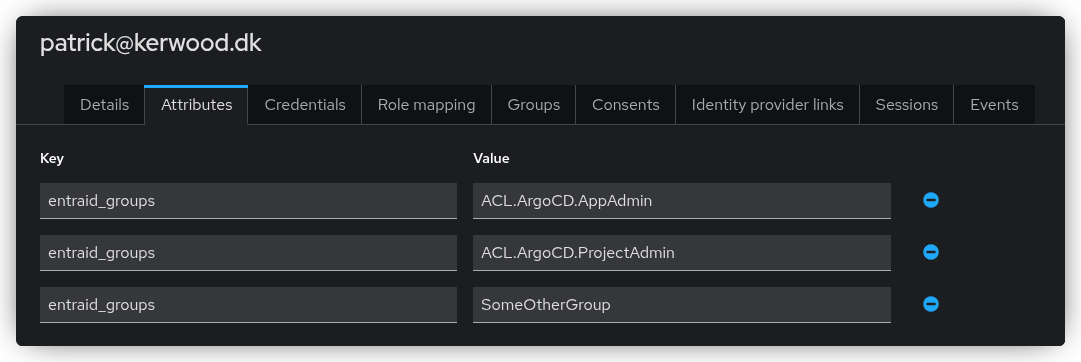
Whenever a user logs in, you can view the groups they belong to under the Attributes tab of their user profile.
Note
The Unmanaged Attributes option must be enabled under Realm Settings before this tab becomes visible.
Next, we need to create a client scope that can be attached to a Keycloak client.
This scope will map the entraid_groups user attribute to the groups claim in the access token.
You have two options here, use the native User Attribute mapper or the custom mapper I developed, which allows filtering values using a specified regular expression. If you want to filter the group claim, you must install the custom mapper (opens new window) first.
- In the Keycloak Admin Console, go to Client scopes and click Create client scope.
- Name it
entraid_groupsand set the Type to Default if you want this scope to be automatically applied to all new clients. - Leave the protocol as OpenID Connect and click Save.
Option 1: Configuring the Native Mapper
- Open the Mappers tab and click Configure a new mapper, then select User Attribute from the list.
- Configure the mapper as follows:
- Name:
groups - User Attribute:
entraid_groups(custom) - Token Claim Name:
groups - Multivalued: ON (since the group claim is an array)
- Name:
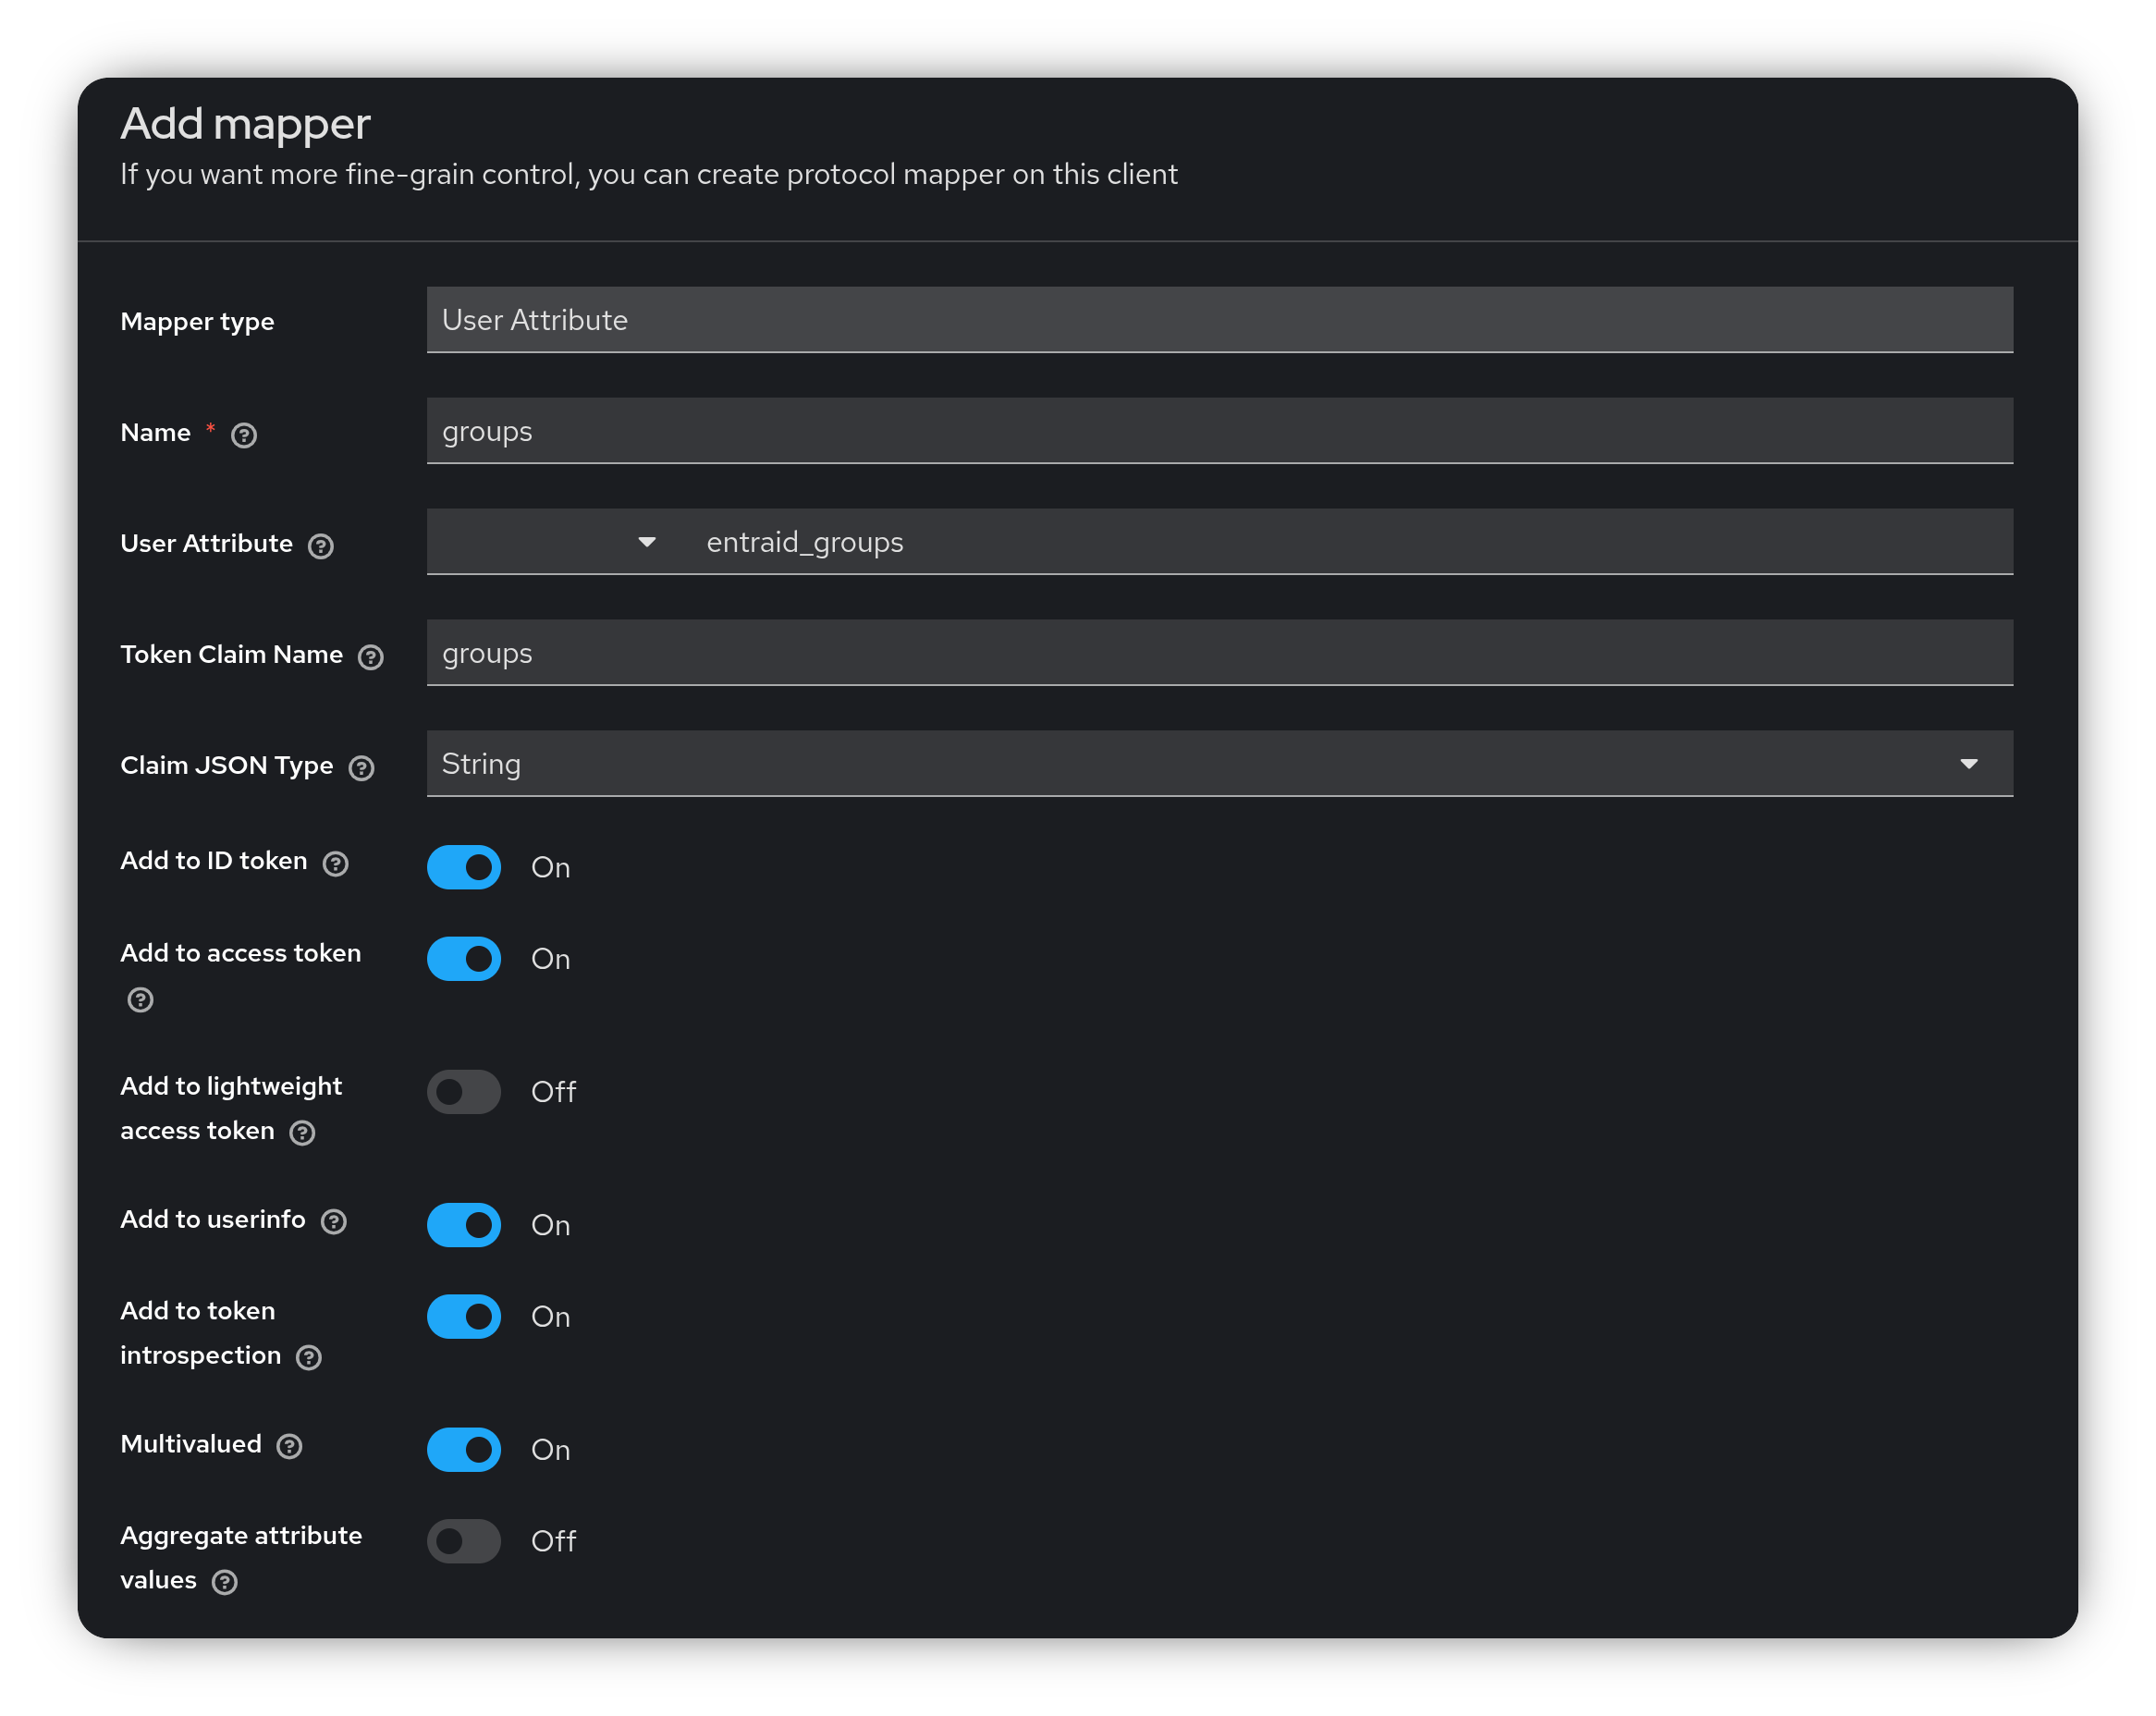
Click Save.
Option 2: Configuring the Custom Mapper
- Open the Mappers tab and click Configure a new mapper, then select User Attribute Filter from the list.
- Configure the mapper as follows:
- Name:
groups - User Attribute Name:
entraid_groups - Regex Filter: Your regex filter, in this example
ACL\.ArgoCD\..* - Token Claim Name:
groups
- Name:
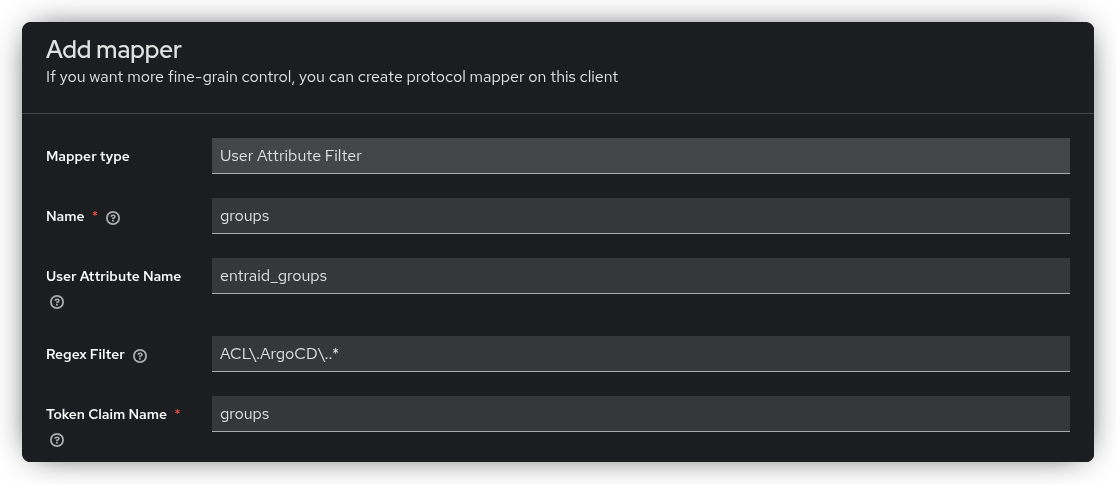
Click Save. In the above example only groups that start with ACL.ArgoCD. will be mapped to the groups claim.
Final Step for both options
To apply the scope to a client, navigate to the desired client, open the Client Scopes tab, and click Add client scope. Then, select the newly created scope to attach it to the client.
# Testing the Client
You can use Postman (opens new window) to test your Keycloak client. To test the Authorization Code flow, you’ll need the Keycloak authorization and token endpoints.
In the Keycloak Admin Console, go to Realm Settings.
At the bottom of the General tab, click the OpenID Endpoint Configuration link to view all OIDC endpoints.
Note the values for authorization_endpoint and token_endpoint, you’ll need these in Postman.
You’ll also need to add a callback URL to your Keycloak client, depending on whether you’re using Postman in the browser or the Postman desktop application:
https://oauth.pstmn.io/v1/callbackhttps://oauth.pstmn.io/v1/browser-callback
Next, open Postman and create a new request (you don’t need to specify a URL).
- Go to the Authorization tab.
- Set the Auth Type to OAuth 2.0.
- Choose your Grant type, either of two below:
- Authorization Code
- Authorization Code (With PKCE)
- Set the Auth URL to the Keycloak
authorization_endpoint. - Set the Access Token URL to the Keycloak
token_endpoint. - Set the Client ID to the Keycloak client ID.
- If you are using the flow without PKCE, you will need to set the Client Secret as well.
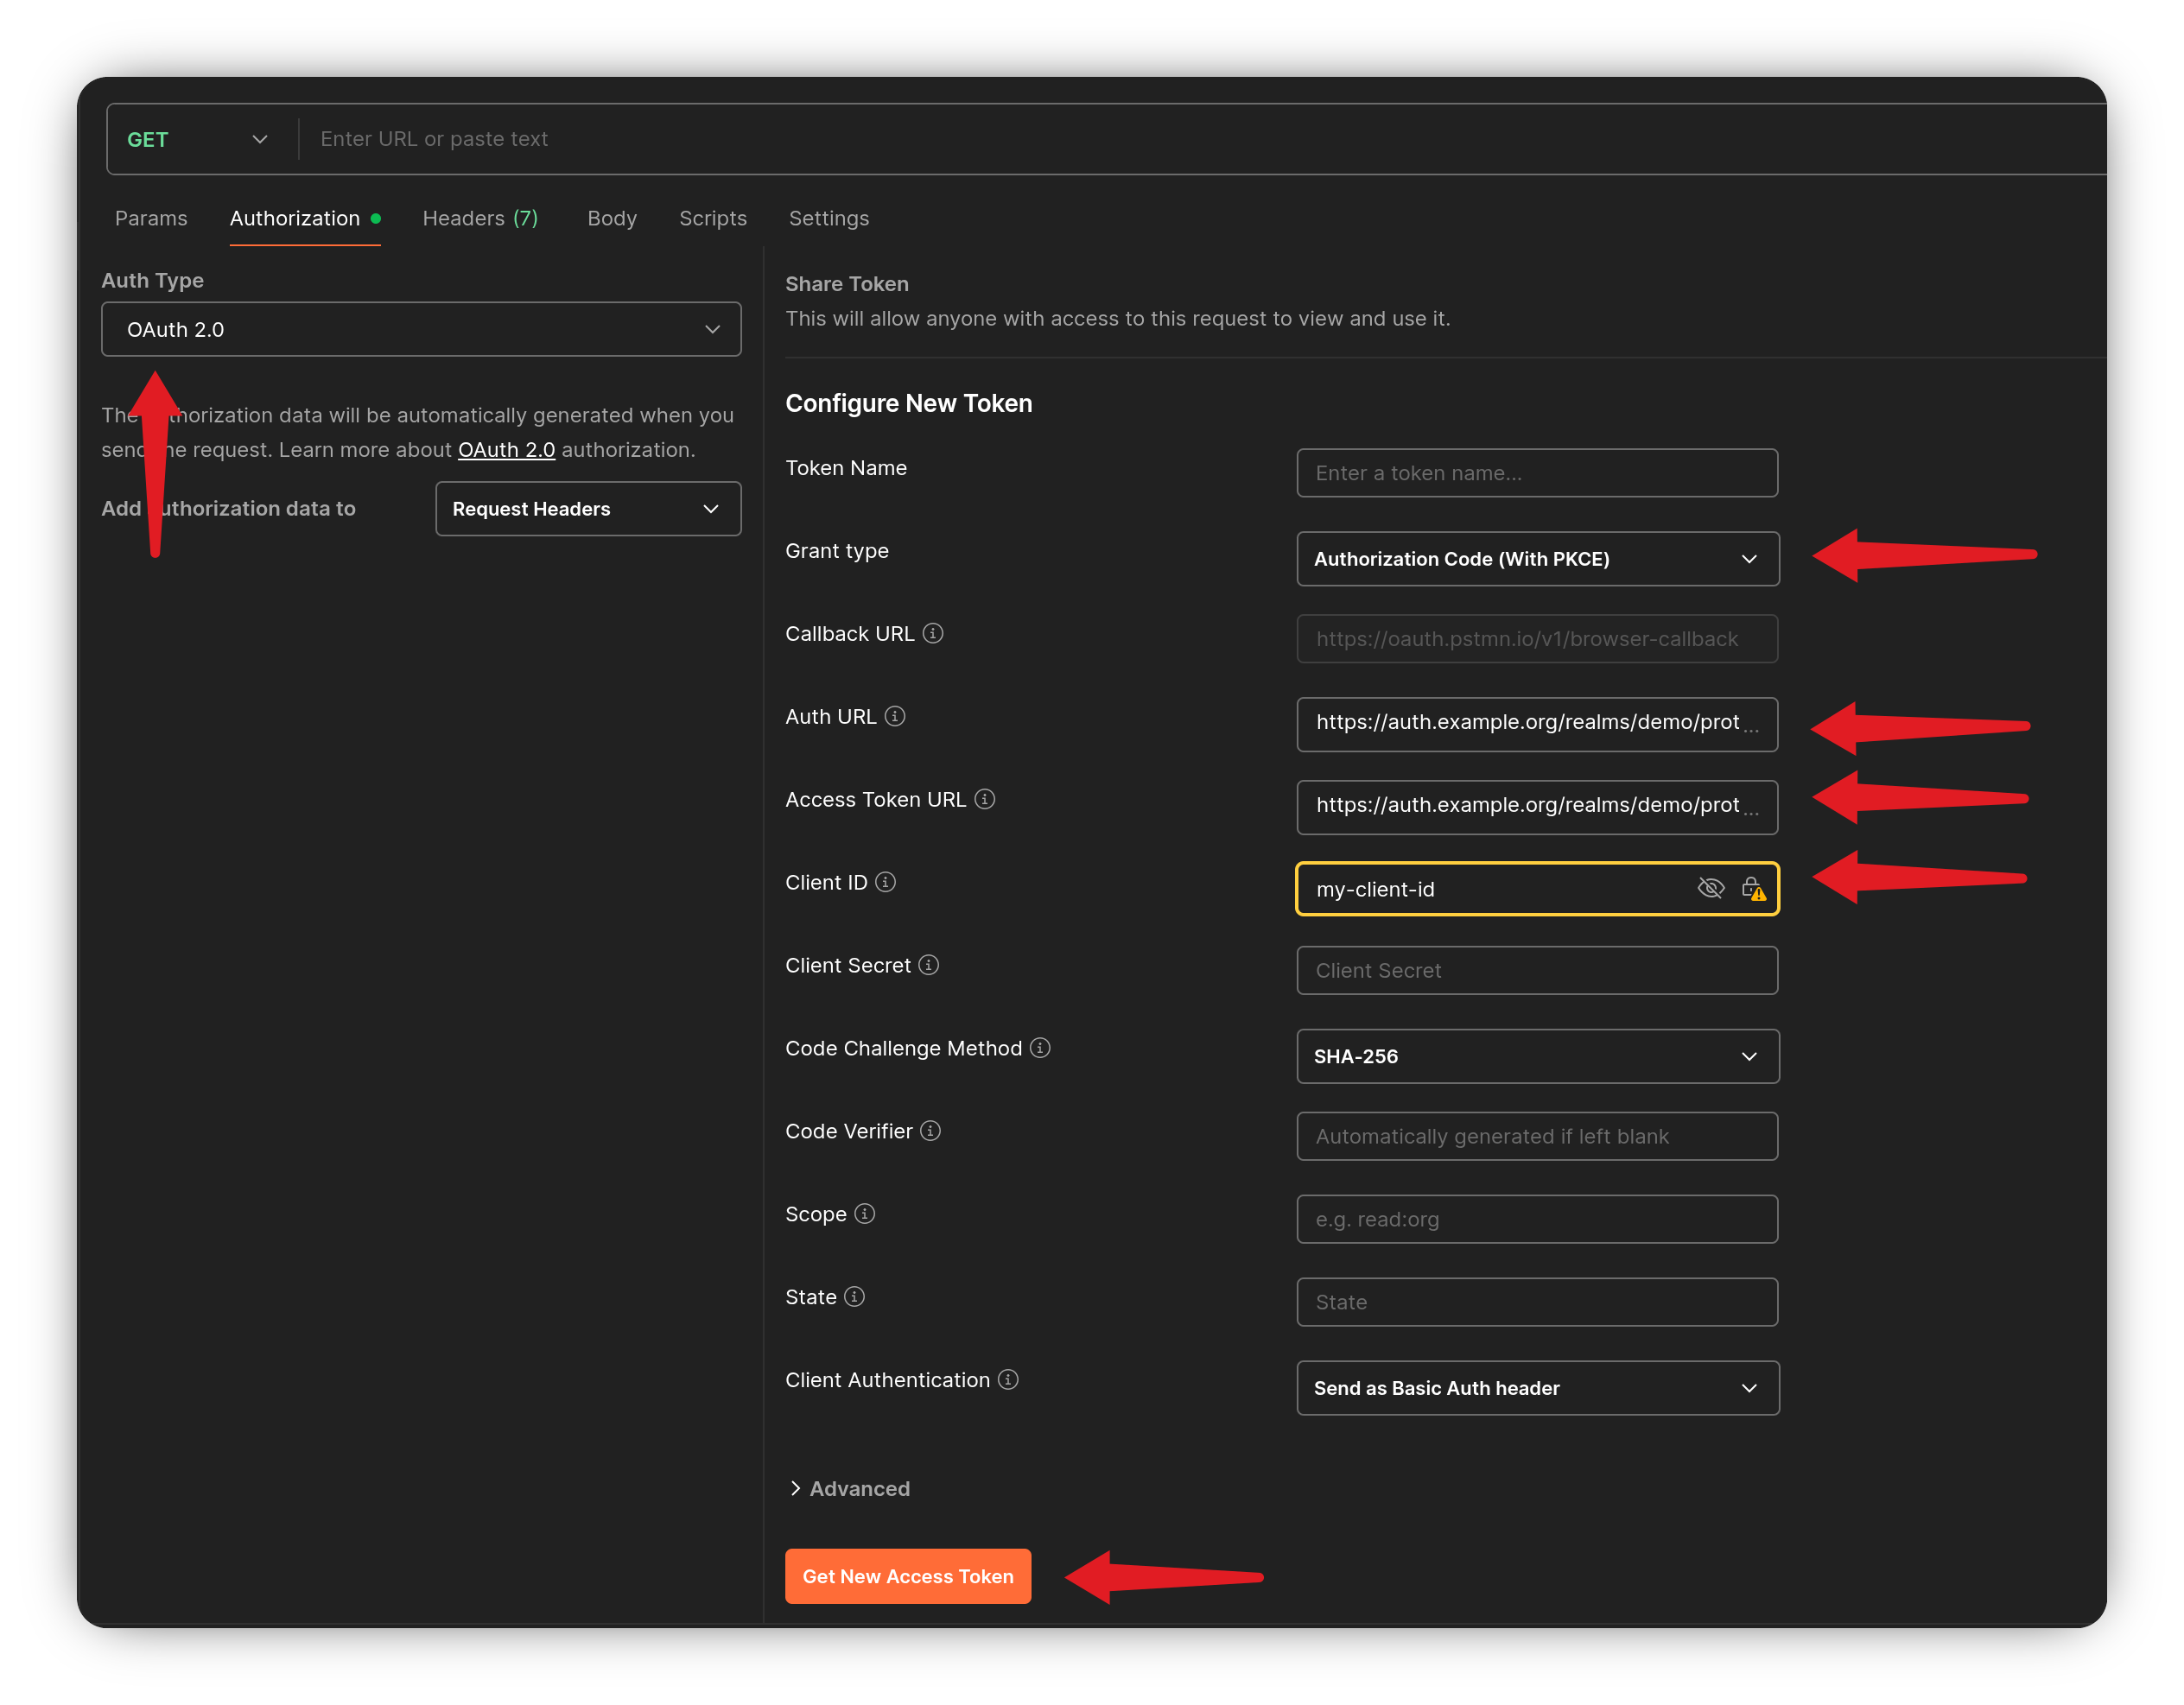
Click the Get New Access Token button to start the login flow. Once the access token is issued, copy it to jwt.io (opens new window) to decode and inspect its contents.
# Assign Keycloak Groups
As mentioned earlier, creating a generic Identity Provider in Keycloak that maps all group memberships directly into the token has its downsides.
However, you can assign users to Keycloak groups or roles based on the groups claim received from Entra ID. The challenge is that Keycloak cannot automatically create or delete groups or roles from federated claims, the corresponding group or role must already exist in Keycloak. You’ll also need to create a specific mapper on the Identity Provider to handle the group membership mapping.
In the Keycloak Admin Console, go to Identity Providers and select the provider you created. Open the Mappers tab and click Add mapper.
Give the mapper a name, and set Sync Mode Override to Force, this ensures Keycloak updates the user’s group memberships every time they log in. For Mapper Type, choose either Advanced Attribute to Group or Advanced Attribute to Role, depending on your needs (both work similarly).
Click Add Attribute to define a key-value pair:
- Key:
http://schemas.microsoft.com/ws/2008/06/identity/claims/groups - Value: The name of the group in the token claim.
To my knowledge, all attribute key-value pairs must evaluate to true for the user to be added to the group. Next, click Select group and choose the group(s) the user should become a member of.
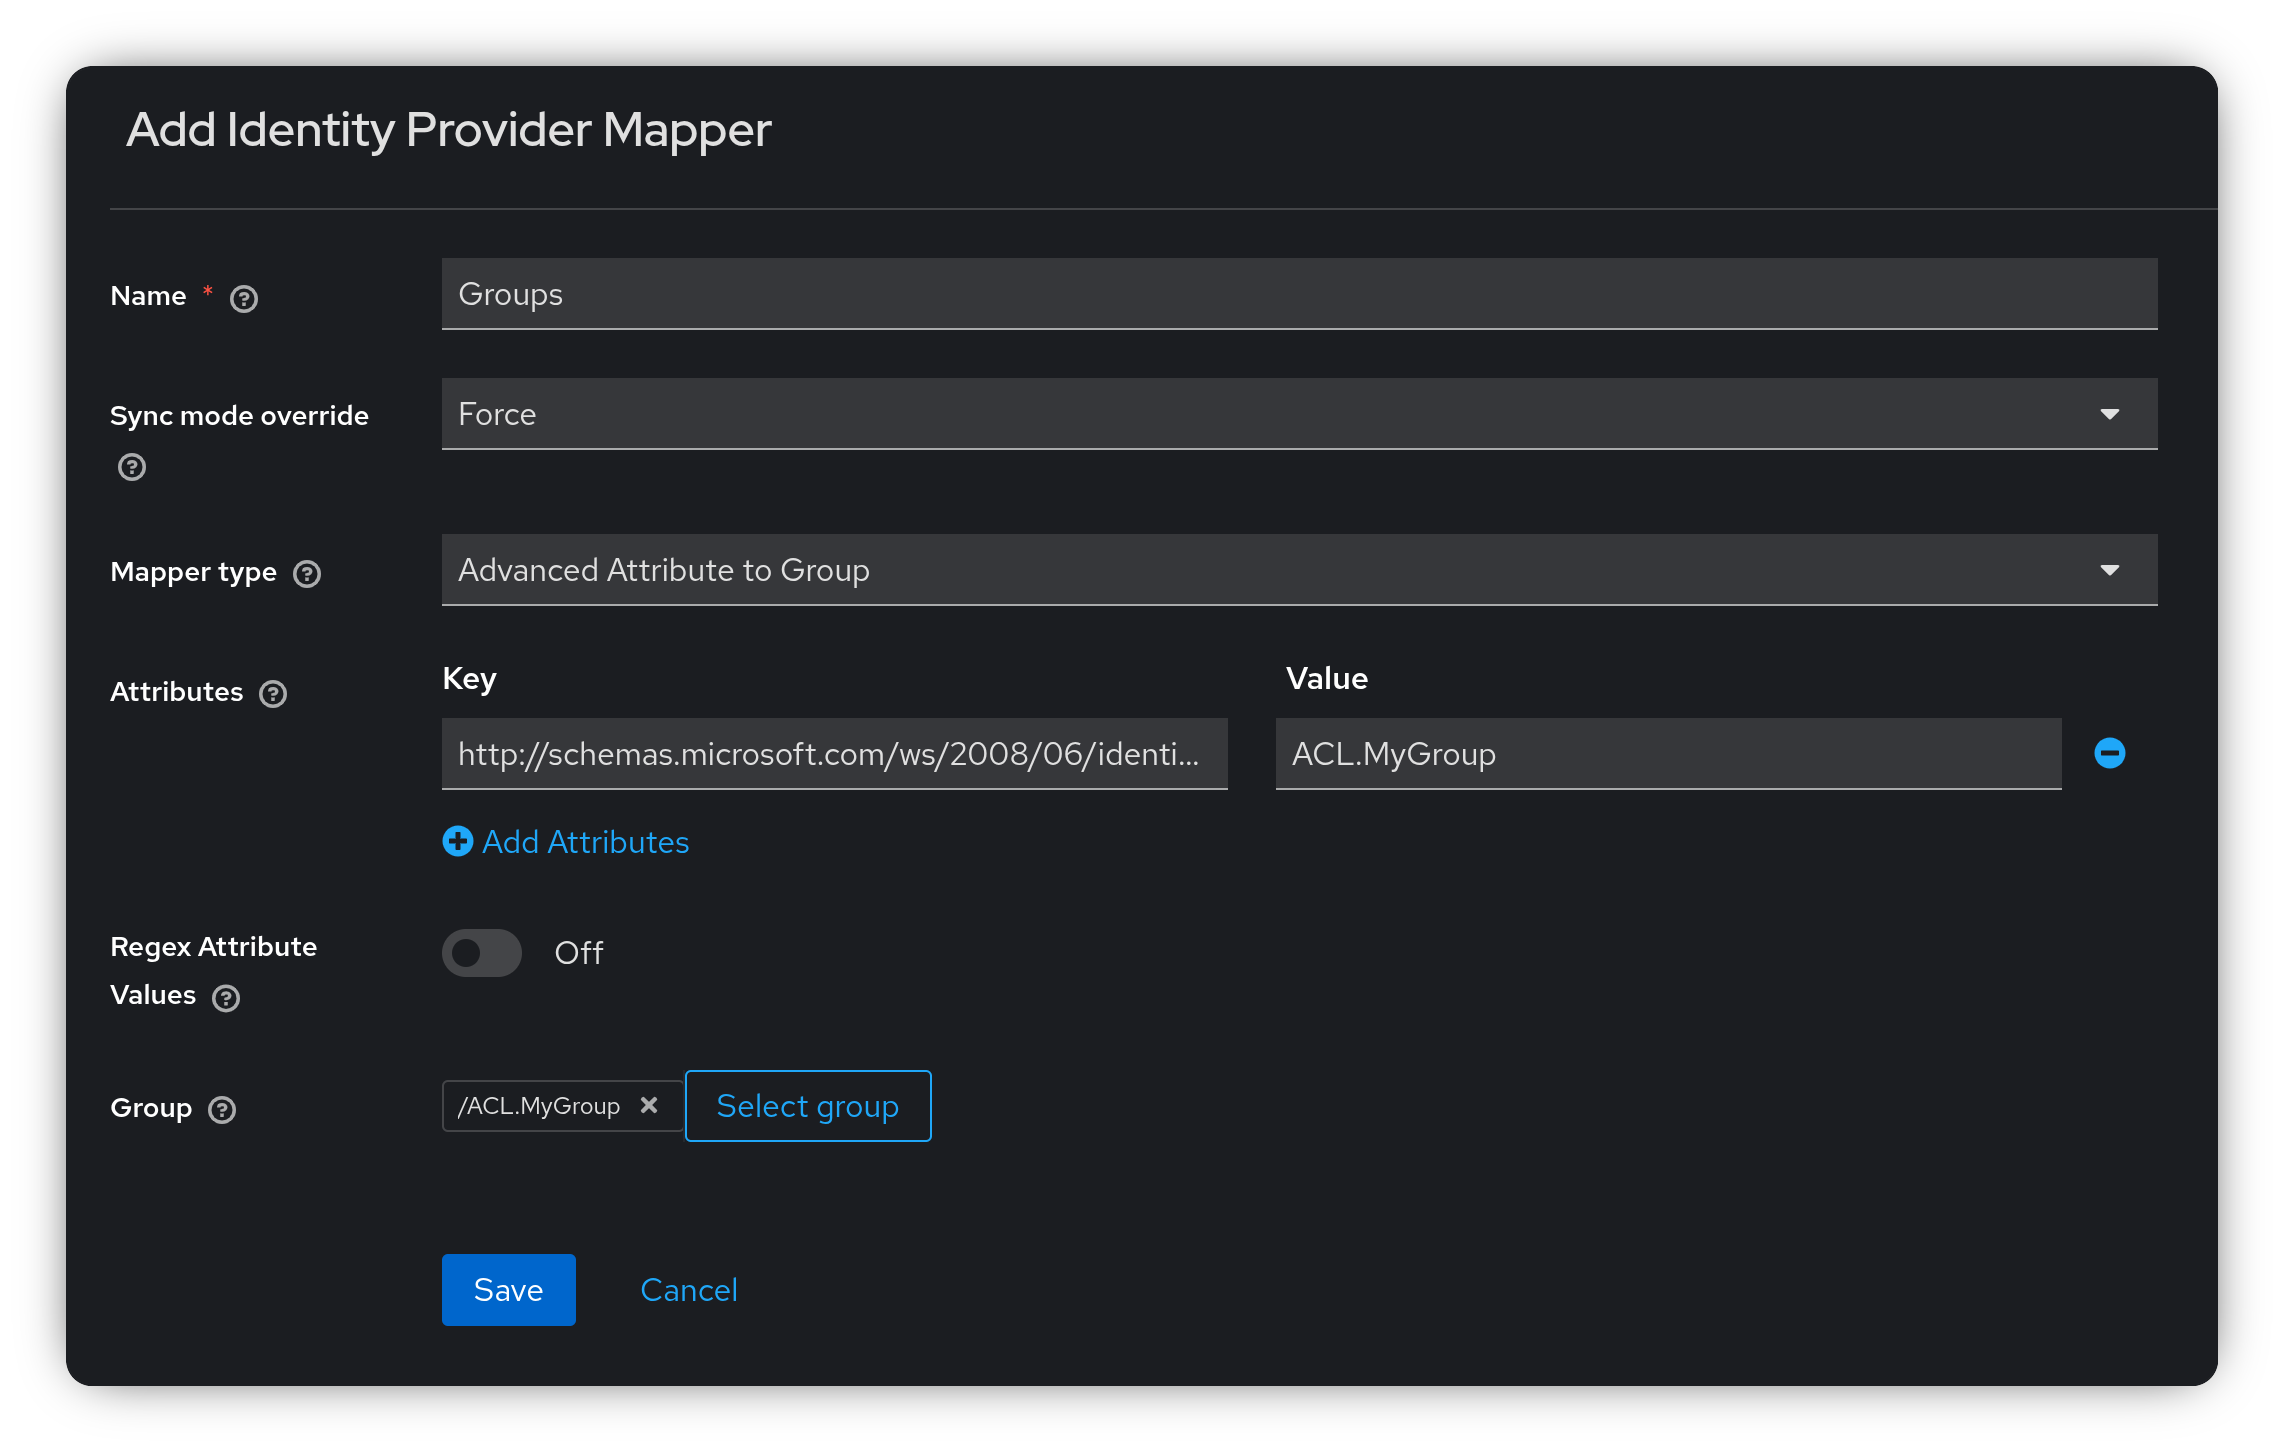
Click Save.
The next time a user logs in and has the ACL.MyGroup group included in the groups claim of the token,
they will be added to the corresponding Keycloak group ACL.MyGroup.
If the user is already a member of the Keycloak group but the group is missing from the claim, the user will be removed from that group.
For a user to be added or removed from a group, they must log out and log in again. You can manage this in Keycloak by going to the Sessions menu. Find the user’s active session, click the three dots, and select Sign Out.

